Spring DIY – Flower Wall Decor

Happy Friday! Here’s a simple apartment DIY that’s perfect for giving your space a springtime update.

Inspiration for my take on this diy, floral wall decor came from this Pinterest post:

And a dank sale on fake flowers at Micheal’s 😉


Supplies you’ll need:

  • Fake flowers
  • Wire cutters
  • Adhesive (I used plain, old masking tape to prevent damaging the walls in my apartment)
  • String lights to add some extra fun


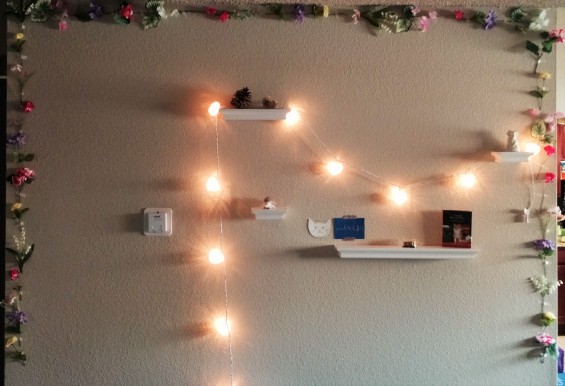
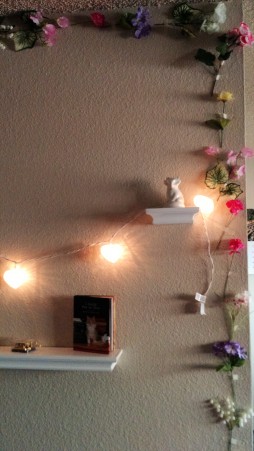
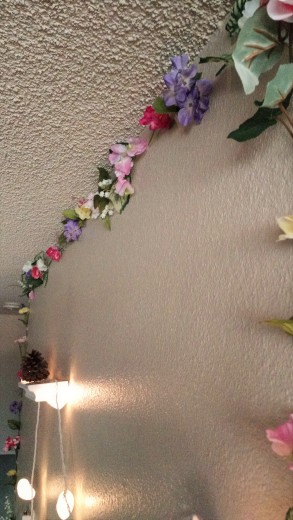
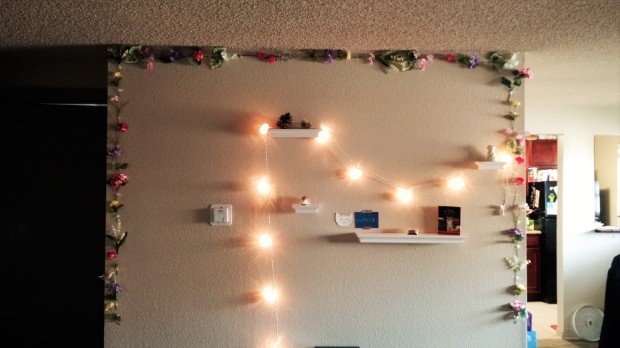
The process is really simple, so I would begin by deciding how you want the flowers to be arranged on your wall. Do you want them in straight, parallel lines like the Pinterest example? I decided that was a little much for what I wanted in my space, which led me to using the flowers as a border for this random accent wall in my apartment.

IMG_20160408_150757769

Once you’ve got an idea of a layout grab your wire cutters and go to work on the bouquets.

IMG_20160405_161653982.jpg

I varied the length of each flower as I cut it away from it’s bouquet, because as you can see from the finished product I’m a little more haphazard and a little less of a perfectionist with my crafts.

IMG_20160408_150851047_TOP.jpg

Next, use the adhesive of your choice to stick each individual flower to the wall. Continue until you’ve completed your desired layout.

Depending on the size of each flower, I taped some of them together in two’s or three’s and others as individuals.


And there you have it! An easy way to brighten up any space for spring and easy to take down once you get bored with it. Add a string of white lights (these I had left over from Valentine’s Day) for an extra touch of fun.

IMG_20160408_151008791 IMG_20160405_160229963

Don’t mind me, just being a weirdo while also showing off my near-perfect eyeliner for the day.


Another shot of the finished product:

IMG_20160408_150747819.jpg

Happy Spring!


Spring DIY: Easter Chalkboard Sign

I love crafting when I have the time. The past few days have been great for it as I’ve been hiding out inside, keeping warm amidst an ever-favorite spring snow in Denver.

I source my crafts from blogs that I love (like Studio DIY), Pinterest and sometimes my own off-the-cuff inspiration. This chalk-painted Easter sign is one of those off-the-cuff projects I decided to do after having this random wooden arrow laying around for months.

I don’t even remember where I bought it, but I’ve been meaning to make it into something other than a plain wooden arrow for months now. I made a trip to Target earlier this week and while checking out the seasonal/holiday section I came across an adorable wooden sign that was simply the word “Easter” painted in green (you can shop it here).

It was super cute, so while I was holding it, trying to decide whether or not to drop the $8, I remembered my stupid wooden arrow at home and decided I could make my own version of this adorable sign. Now, you’re never going to see anything on my blog that looks professional; I mean, I love to make things, but I’m not some incredibly talented or creative person. But regardless of sometimes churning out things that look like they were made by an 8 year old (and yes, I know my handwriting fits into the “8 year old: category), it’s still fun for me 🙂


Here’s the stupid, plain arrow.

IMG_20160317_113611980 (2)

I started with a warm black chalk-finish paint I picked up from Michael’s last year, a sponge bush and a cup of water.

IMG_20160317_115329515

Then I slicked two coats of the chalk-finish paint on the arrow. Normally, I would have sealed the paint with this spray Mod Podge, but it was 30 degrees and you definitely can’t spray this stuff inside, so I opted out of the sealant this time.

IMG_20160317_140917745.jpg

It says on the paint’s label to let each coat dry for 2 hours before applying the check. Che’yah, nope. This stuff dries faster than normal acrylic paint, I gave it maybe 15 minutes between coats and it was fine.

And now for the finished product! I wrote “easter” on the sign in lower-case cursive (a la my Target inspiration) and drew  a few spring-like flowers using different colors of chalk. The best part about my version of the sign is that I’ll be able to re-use it for other events and holidays.

Happy weekend!

IMG_20160318_150030029